How to set up your computer to interpret on Interprefy's platform
A step-by-step guide to help you with the technical set-up for a successful interpreting job on Interprefy's RSI platform.
Before you begin:
- Switch off your computer
- Connect with an Ethernet cable to the internet
- Plug your PC or laptop into the electricity
- Connect your USB headset to the computer
- Switch on your computer and allow a minute to let it switch to the new soundcard or install any necessary drivers
- Quit all other software that might take control over your headset or microphone (Skype, Zoom, Webex...). Make sure you sign out and not just minimize the program
- Make sure that your headset is properly connected and working. You can always test your devices on https://interprefy.interpret.world/test
Set up of sound input
Example on Windows computer, using Windows 10:
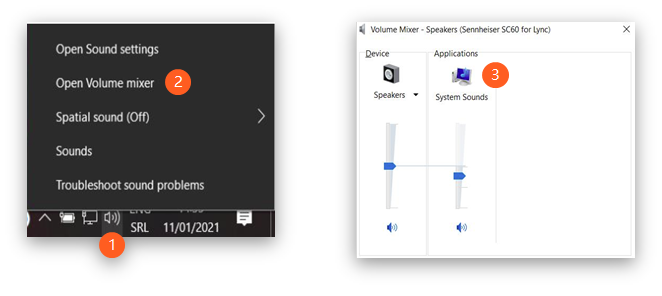
1. Right-click on the speaker icon on the taskbar (1), usually located at the bottom-right corner.
2. Click on 'Open Volume mixer' (2).
3. Double-click on the computer icon called 'System Sounds' (3).
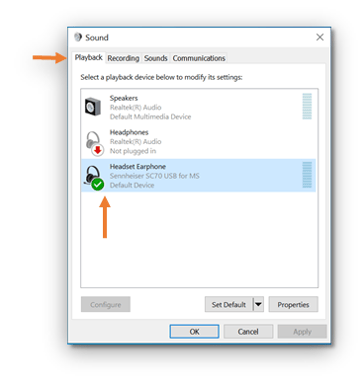
4. Make sure your headset is selected on the 'Playback' tab.
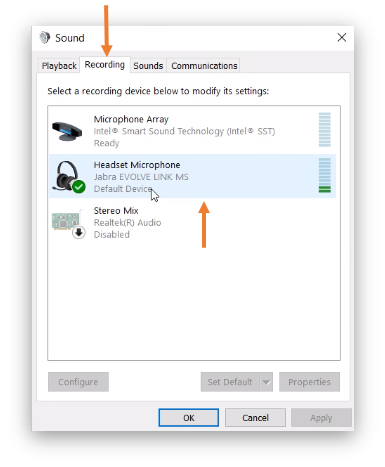
5. Make sure your microphone is selected on the 'Recording' tab.
If the correct devices are not selected:
Right-click on the device you want and select both 'Set as default device' and 'set as default communication device':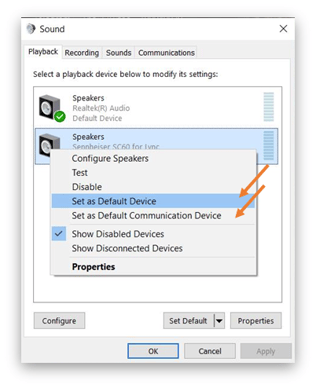
6. Test that the sound comes through the selected device by playing a song or video.
7. Speak to test the microphone. The green bars on the device should light up.

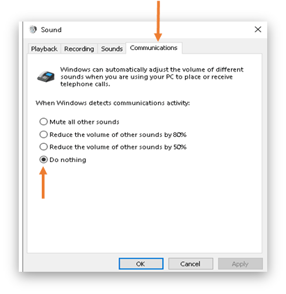
8. Select the tab called 'Communications' and make sure that 'Do Nothing' is selected:
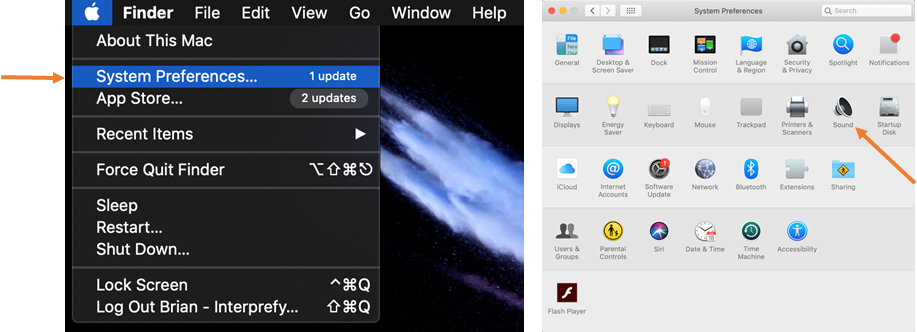
Example on Mac computer, using macOS Monterrey :
- Click on the Apple icon on the top left corner of your screen and select 'System Preferences' → 'Sound':
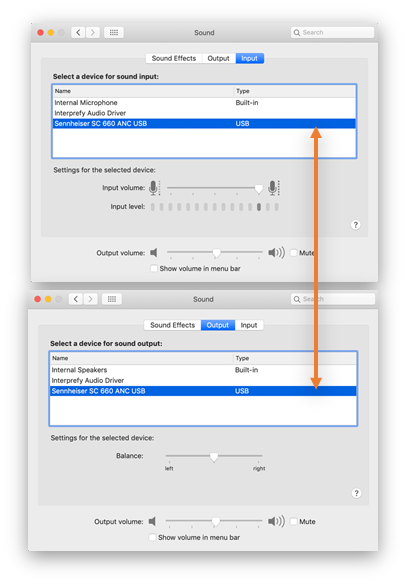
2. Make sure the correct device is selected for both 'input' and 'output'. Alternatively, choose the correct one by clicking on it.
Power settings:
For PC users:
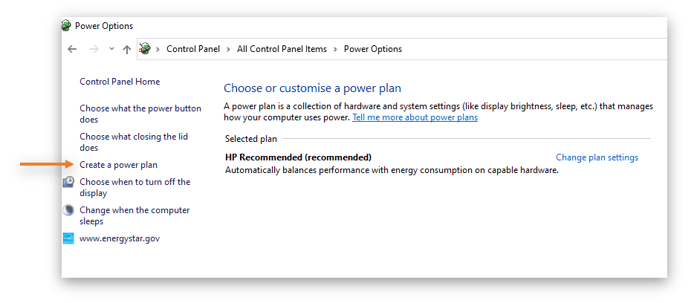
- Go to ‘Control Panel’ → ‘Power Options’.
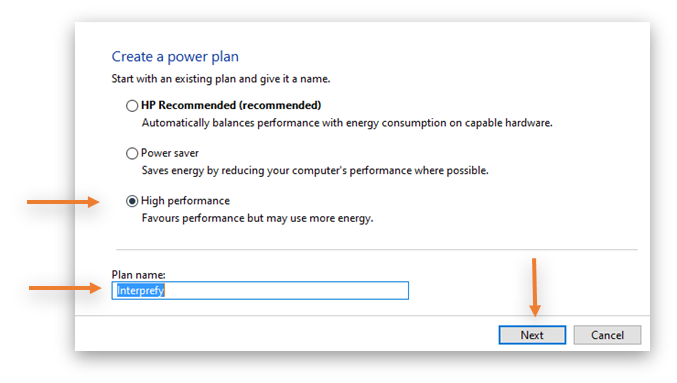
- Choose ‘Create a power plan’, select 'High performance' and name the plan 'Interprefy'.
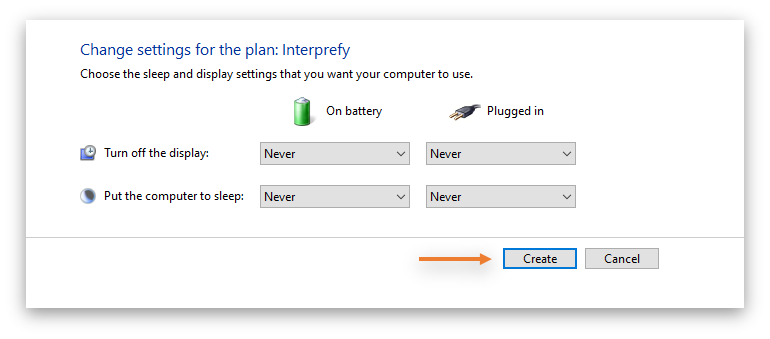
3. Edit the plan settings, select 'never' for each option as per the picture below, and click 'create'.
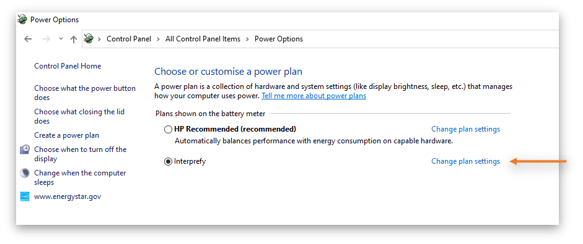
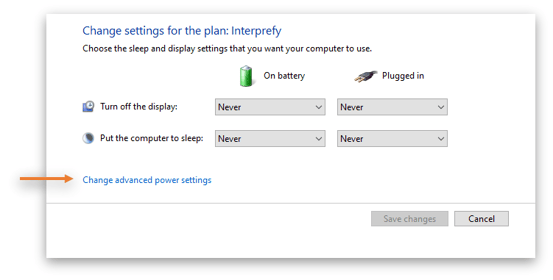
4. Select the new plan and choose ‘Change plan settings → 'Change advanced power settings.'
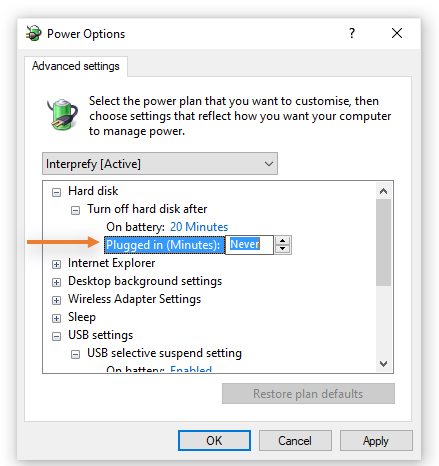
5. Change ‘Hard Disk’ settings as per the picture below:
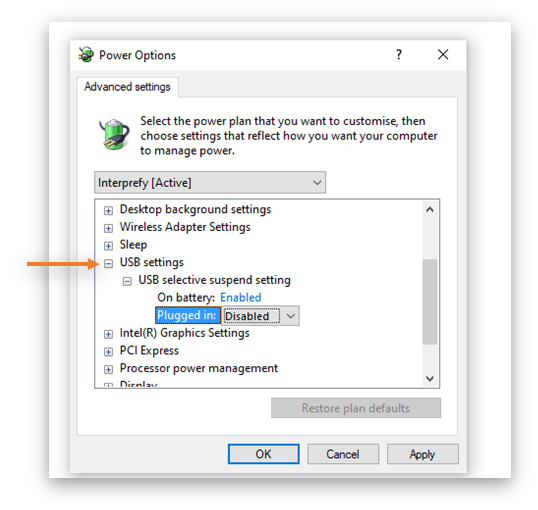
6. Change ‘USB settings’ settings as per the picture below, then click OK:
For Mac users:
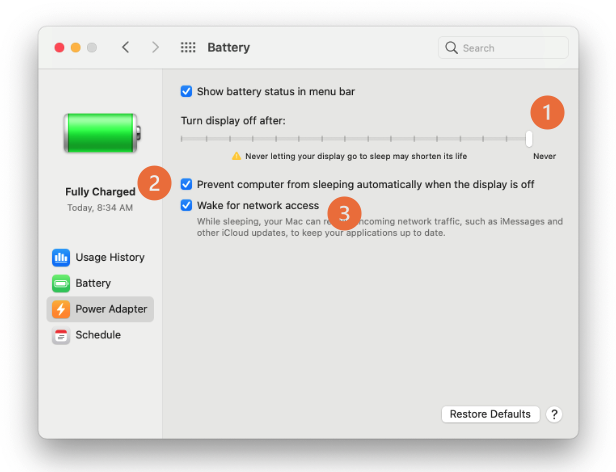
Open your power settings and set them up as per the picture below:
- Set cursor to 'Never'.
- Select 'Prevent computer from sleeping automatically when the display is off'.
- Select 'Wake for network access'.
To keep a healthy battery, make sure you turn your computer off when you are not using it (not only closing the laptop) and let the battery drain out every once in a while.
