
Before you begin:
- Webex plan type: Enterprise Plan
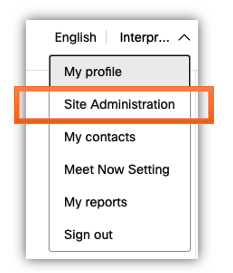
- Sign in to www.webex.com, click on your name on the upper right side and select Site Administration. It will open Cisco Webex Control Hub in a separate tab on your browser.
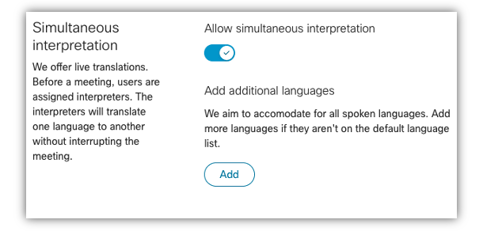
- On the left-side bar, under MANAGEMENT, click on Organization Settings

- Slide the button to Activate simultaneous interpretation and click on Add to add the languages of your choice
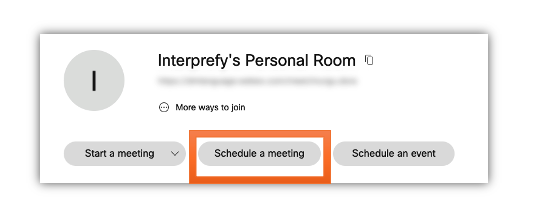
- You can now close this tab and return to your Webex site. Once there, click on Schedule a Meeting to set up your meeting. Please note the interpretation option will NOT work with "Start a Meeting"
- Once you've scheduled the meeting, scroll down and click Show Advanced Options. Under Scheduling options select Enable Language Interpretation and click on Assign Interpreters
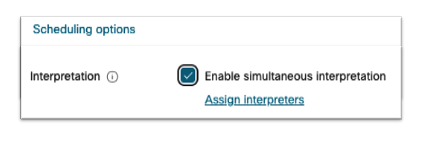
- Select the incoming and outgoing languages accordingly i.e. English - Japanese and insert the email of your contact person at Interprefy.
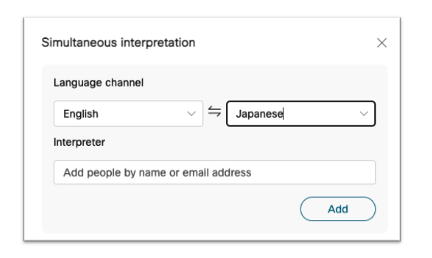
If more than one language is offered for your meeting/webinar, click Add to add more languages.
Please note, a different email address will be required for each interpreter and your Interprefy contact person will provide them to you.
The interpretation feature on Webex is not compatible with breakout session. If you have included breakout sessions on your meetings, these will be disabled when you enable interpretation.
Images source: Webex