
You can access your event recordings in the Interprefy Media Hub using a secure Direct Link provided by your Interprefy team. From the Media Hub, you can view, download, edit and share available recordings, audio files, captions, and transcripts.
The Direct Link provides simplified access to the Media Hub, allowing you to access only the content associated with your event.
What is Media Hub Direct Link
A Media Hub Direct Link is a unique, password-protected link that provides direct access to your event content without requiring standard login methods or broader permissions, while keeping your content secure.
Depending on the event setup, the available content may include:
- Event recordings
- Audio files for available language channels
- Captions files (SRT and VTT)
- Transcript files (TXT)
How to access your event recordings
- Open the Direct Link provided by your Interprefy team
- Click the "Login" button
- You will be automatically logged in to your content page
When accessing the Direct link, token and password are already prepopulated, so no additional steps are required.
Once logged in, you will be taken directly to your event recordings and available files.
Media Hub
Understanding sessions and files
Events in the Media Hub are organised into sessions, grouped by day and sorted by time.
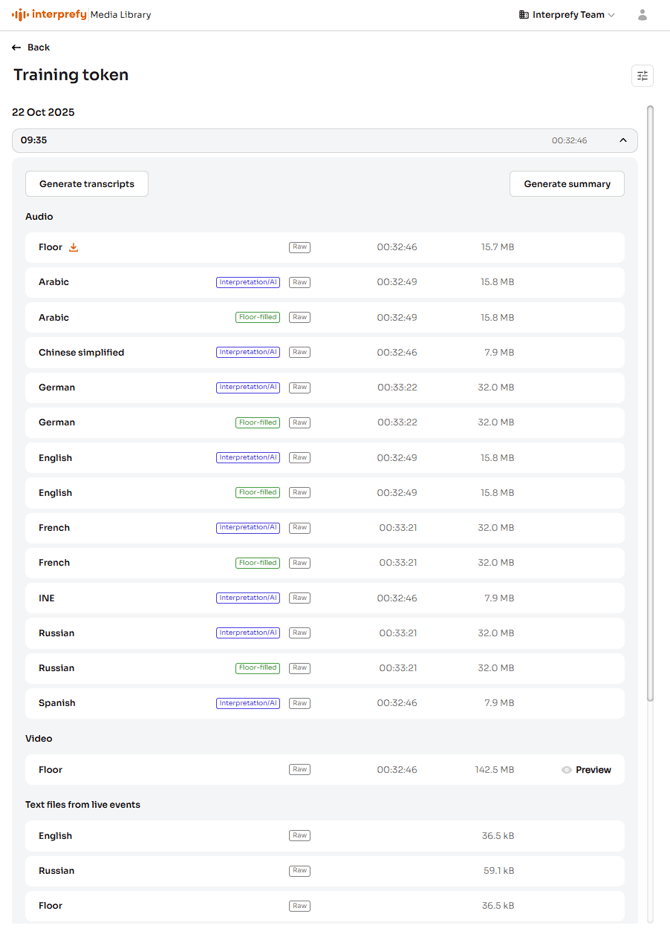
Expanding a session displays all available files for that session.
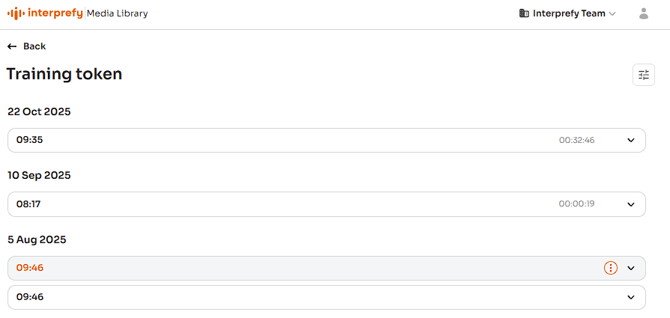
Depending on the event setup and whether session was recorded, your sessions may contain:
- Video recordings
- Audio files for language channels
- Captions files
- Transcript files
If a session was not recorded, but the Captions were enabled, only text files are available. These files store captions generated during the event without modifications.
Audio file types
Audio files appear in two categories: Interpretation/AI or Floor-filled.
Interpretation/AI
Contains only the interpreted or AI-translated audio for the selected language channel.
Floor-filled
Files combining floor audio and language channel.
For example, an English floor-filled file contains the English interpretation or AI-translated audio and switches to the original floor audio when the speaker is speaking English. This creates a complete English audio track.
Media Hub overview
Downloading files
Files in the Media Hub can be downloaded by hovering over the card to reveal the download icon, then clicking it to start the download.

Editing recordings
You can perform common post-production edits directly from the recording preview in the Media Hub, without using external tools or requesting assistance from the Interprefy team.
The available editing tools allow you to remove unwanted sections, correct caption timing, and generate downloadable content with the selected audio and captions.
Edited files are created alongside the original files, which remain available in the Media Hub.

Trim recordings
Use the trimming tools to remove unwanted sections from the beginning, end, or middle of a recording.
This can be useful when:
- The recording starts before the relevant content.
- The session continues longer than required.
- The recording contains breaks or sections that should not be included.
Split the recording timeline and delete the sections you do not want to keep. When the trim is applied, the change is reflected across the video, related audio files, and text-based files.
Apply caption offset
Use the caption offset setting when captions appear slightly before or after the corresponding speech in the recording.
The timing can be adjusted separately for each language. Once the offset is applied, the corrected timing is saved to the underlying caption files and preserved when the captions are downloaded or included in a burned video.
Burn & Download
Use Burn & Download to generate a downloadable video based on the current preview configuration.
The selected audio track and captions are applied to the final file, allowing you to export a ready-to-share version that matches the recording reviewed in the preview.
Before generating the file, confirm that the correct audio track and caption language are selected.
Filters
The Media Hub includes filtering options to help manage displayed files and sessions, located in the upper right corner.
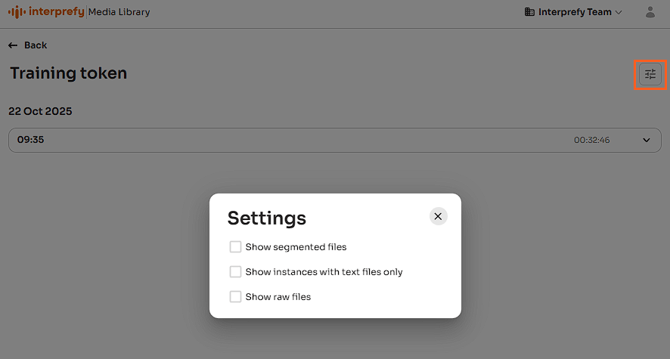
Show segmented files
Displays recordings divided into 1-hour segments. By default, only full files are shown to simplify the view.
Show instances with text files only
Sessions with and without recordings by default show only those with recordings. Enabling this option displays both, labeled “Recordings” and “CC only”.
Show raw files
Displays original uploaded files in addition to enhanced or edited versions where applicable.
Generated Transcripts
You can generate a post-event transcript from the recording by selecting "Generate Transcript" in the upper-left corner of the session.
Unlike captions created live during the event, the generated transcript is produced from the completed recording. This additional processing may provide a more accurate transcript.
Once generated, the transcript is available under Text files from recordings and can be downloaded like other text files.
Summaries
Users can generate a summary for every session with captions, using a "Generate summary" button located in the upper right corner of the session.
AI generates summaries that include an executive overview, participant list, discussed topics, agreed actions, and more.
Once generated, summaries can be downloaded like other text files, previewed, or copied to the clipboard for quick sharing.
Summaries can be generated in languages not originally spoken during the event.
What to expect
- You will only see content related to your event.
- Recordings and transcripts will appear on the page once they are available.
- Content is typically processed and available within 10 minutes after the recording ends
- If content is still being processed, the page may temporarily appear empty until processing is complete